SpringBoot異步任務(wù)使用方法詳解
步驟,如圖所示:
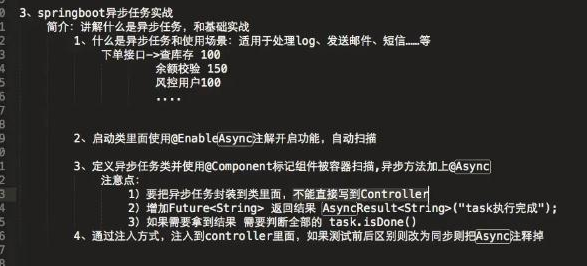
1.添加異步任務(wù)業(yè)務(wù)類
package top.ytheng.demo.task;import java.util.concurrent.Future;import org.springframework.scheduling.annotation.Async;import org.springframework.scheduling.annotation.AsyncResult;import org.springframework.stereotype.Component;//異步任務(wù)業(yè)務(wù)類@Component//標(biāo)記此類是異步類,也可在方法中標(biāo)記//不加,則類里面的方法為同步執(zhí)行@Asyncpublic class AsyncTask { public void task1() throws InterruptedException { long begin = System.currentTimeMillis(); Thread.sleep(1000); long end = System.currentTimeMillis(); System.out.println('任務(wù)1耗時(shí):' + (end - begin)); } public void task2() throws InterruptedException { long begin = System.currentTimeMillis(); Thread.sleep(2000); long end = System.currentTimeMillis(); System.out.println('任務(wù)2耗時(shí):' + (end - begin)); } public void task3() throws InterruptedException { long begin = System.currentTimeMillis(); Thread.sleep(3000); long end = System.currentTimeMillis(); System.out.println('任務(wù)3耗時(shí):' + (end - begin)); } //測試拿到返回結(jié)果 public Future<String> task4() throws InterruptedException { long begin = System.currentTimeMillis(); Thread.sleep(1000); long end = System.currentTimeMillis(); System.out.println('任務(wù)4耗時(shí):' + (end - begin)); return new AsyncResult<String>('任務(wù)4'); } public Future<String> task5() throws InterruptedException { long begin = System.currentTimeMillis(); Thread.sleep(2000); long end = System.currentTimeMillis(); System.out.println('任務(wù)5耗時(shí):' + (end - begin)); return new AsyncResult<String>('任務(wù)5'); } public Future<String> task6() throws InterruptedException { long begin = System.currentTimeMillis(); Thread.sleep(3000); long end = System.currentTimeMillis(); System.out.println('任務(wù)6耗時(shí):' + (end - begin)); return new AsyncResult<String>('任務(wù)6'); }}
2.添加測試控制器
package top.ytheng.demo.controller;import java.util.concurrent.ExecutionException;import java.util.concurrent.Future;import org.springframework.beans.factory.annotation.Autowired;import org.springframework.web.bind.annotation.GetMapping;import org.springframework.web.bind.annotation.RequestMapping;import org.springframework.web.bind.annotation.RestController;import top.ytheng.demo.task.AsyncTask;@RestController@RequestMapping('api/v1/async')public class TaskController { @Autowired private AsyncTask asyncTask; @GetMapping('/test') public Object test() throws InterruptedException, ExecutionException { long begin = System.currentTimeMillis(); //asyncTask.task1(); //asyncTask.task2(); //asyncTask.task3(); Future<String> result1 = asyncTask.task4(); Future<String> result2 = asyncTask.task5(); Future<String> result3 = asyncTask.task6(); System.out.println('返回結(jié)果:' + result1.get() + ',' + result2.get() + ',' + result3.get()); for(;;) { if(result1.isDone() && result2.isDone() && result3.isDone()) {break; } } long end = System.currentTimeMillis(); long total = end - begin; System.out.println('總耗時(shí):' + total); return '總耗時(shí):' + total; }}
3.添加啟動類
package top.ytheng.demo;import org.mybatis.spring.annotation.MapperScan;import org.springframework.scheduling.annotation.EnableAsync;import org.springframework.scheduling.annotation.EnableScheduling;import org.springframework.boot.autoconfigure.SpringBootApplication;import org.springframework.boot.web.servlet.ServletComponentScan;@SpringBootApplication //等于下面3個(gè)//@SpringBootConfiguration//@EnableAutoConfiguration//@ComponentScan//攔截器用到@ServletComponentScan//MyBatis用到@MapperScan('top.ytheng.demo.mapper')//定時(shí)使用(開啟定時(shí)任務(wù))@EnableScheduling//開啟異步任務(wù)@EnableAsyncpublic class DemoApplication { public static void main(String[] args) { SpringApplication.run(DemoApplication.class, args); }}
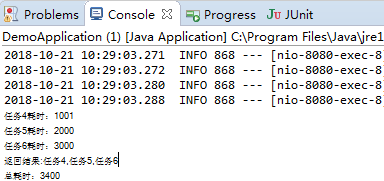
4.右鍵項(xiàng)目Run As啟動,訪問url
http://localhost:8080/api/v1/async/test
結(jié)果:
以上就是本文的全部內(nèi)容,希望對大家的學(xué)習(xí)有所幫助,也希望大家多多支持好吧啦網(wǎng)。
相關(guān)文章:
1. IntelliJ IDEA設(shè)置條件斷點(diǎn)的方法步驟2. SSM框架JSP使用Layui實(shí)現(xiàn)layer彈出層效果3. IntelliJ IDEA導(dǎo)入jar包的方法4. 刪除docker里建立容器的操作方法5. IntelliJ IDEA導(dǎo)出項(xiàng)目的方法6. Python request中文亂碼問題解決方案7. XML在語音合成中的應(yīng)用8. JS樹形結(jié)構(gòu)根據(jù)id獲取父級節(jié)點(diǎn)元素的示例代碼9. Python Selenium操作Cookie的實(shí)例方法10. Ajax基礎(chǔ)使用詳解

 網(wǎng)公網(wǎng)安備